
How to Turn a B2B Case Study into a 90-Second Video
Turn a B2B customer case study into a 90-second video. Learn how to write the script, design the narration, match visuals, and check the final cut.

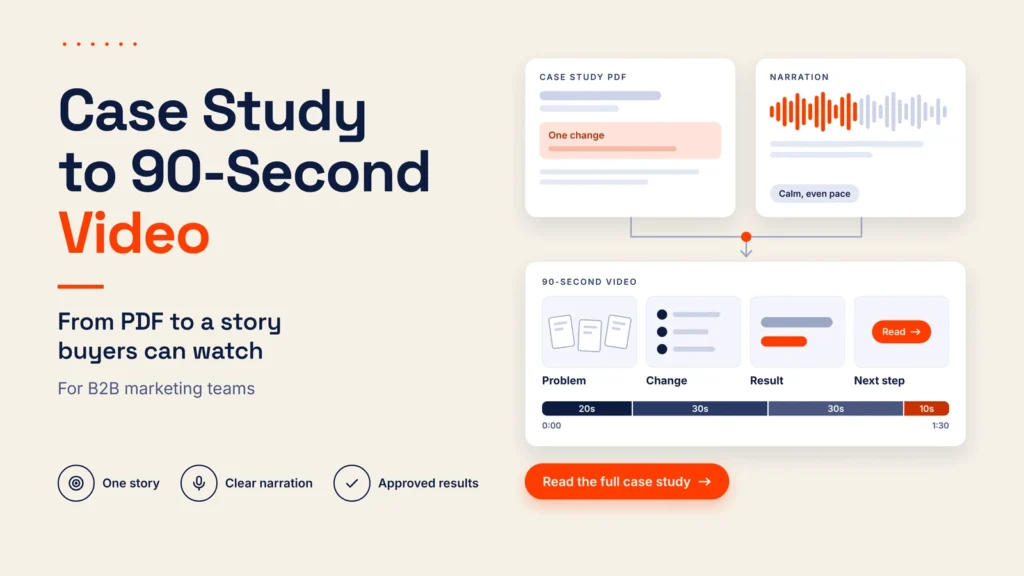
Your team has a customer story worth sharing. It explains what the customer changed and what happened afterward. But the case study sits in a PDF that a busy buyer may never finish.
A short video gives that story another way to reach people. It can introduce the case on a landing page, support a sales follow-up, or give someone a reason to read the full version.
You can make one with a short script, a few clear visuals, and a narrator who suits the story. Here is a practical way to put those pieces together.
1. Choose one change the buyer will recognize
Start with the part of the case that matters to your intended viewer. A finance manager may care about fewer billing errors. An operations manager may want to know how the team stopped losing requests between departments.
Choose one of those stories for the video. Trying to cover every benefit makes ninety seconds feel like a hurried product tour.
Before writing, answer four questions:
- What was difficult for the customer?
- What did the team change?
- What evidence shows the difference?
- Where can viewers find the full story?
Use results that the customer has approved. If a metric covers one team, one location, or one quarter, keep that context. “Response time fell during the pilot” and “response time fell across the company” tell different stories
2. Write a script someone can follow once
A reader can pause over a complicated sentence. A listener has to keep up. Give each sentence one job and put the customer’s problem before the product explanation.
As a starting structure, allow about twenty seconds for the problem, thirty for the change, thirty for the result and its context, and ten for the next step. Adjust those timings after listening.
Here is a fictional example to show the shape of the story. The company and figures are illustrative:
Every Monday, the support team at Northline opened three spreadsheets to work out which customer requests still needed an answer.
Some requests appeared twice. Others had no owner. Before the team could help customers, someone had to sort through the list.
Northline tested a shared request queue with its six-person support team. Each request had an owner, a status, and a next action. The team also agreed on who would check the queue each morning.
During the four-week pilot, the median time to a first reply fell from eight business hours to five. That figure covered the pilot team, not every department.
The daily review also gave the team a clear place to discuss requests that had stalled. The software supported the process, but the team still had to maintain it.
The full case study explains how Northline ran the pilot, what it measured, and what it would change next time. Read it before planning a similar rollout.
Read the draft aloud. Replace phrases you would never say to a colleague. Then time the generated narration; word count alone cannot tell you whether it fits.
3. Design a voice that fits the customer story
Decide what the narrator should sound like before generating the full script. For this example, a calm, straightforward voice would fit better than a loud advertising delivery. The story concerns a practical change in a working team.
Write a brief description using qualities you can hear. For example:
An American English narrator with a warm, medium-low voice. Clear pronunciation, an even pace, and a calm, conversational tone.
For the narration, you can use a text to speech tool such as FlowSpeech. Its Voice Design feature lets you describe the voice you want and test it with your script.
Open “AI Voice Design,” enter your description, choose a language, and select “Design a voice.” Listen to the preview, then open “Try Text to Speech,” paste a short passage, and select “Generate.” If the voice suits the story, select “Save voice,” give it a name, and save it for reuse.
Test the opening problem and the sentence containing the result. Listen for whether the customer’s name is clear, the numbers are easy to follow, and the delivery feels believable. If the preview sounds too breathy or too theatrical, change that detail in the description before creating another voice.
Keep the narrator separate from the customer. A designed voice can explain a case, but it should not imply that a real customer recorded a testimonial. Introduce any approved customer quote as a quote.
4. Listen for clarity before adding pictures
Use the saved voice to generate the full narration, then listen without looking at the script. Mark anything that takes effort to understand.
Pay particular attention to abbreviations, product names, percentages, and sentences with several numbers. If “eight business hours to five” is unclear, try “from eight business hours to five business hours.” A few extra words can make the meaning easier to hear.
Check the actual running time. If the audio is too long, cut a repeated point or an unnecessary sentence first. Speeding up the whole recording may leave viewers with less time to understand the result.
Once the full narration sounds right, download the WAV file and import it into your video editor. Leave a little space after an important figure. You can adjust gaps when assembling the audio; the viewer will need time to read the matching caption or chart.
5. Give each part of the story a useful visual
Build the video around the finished narration. Four or five simple scenes may be enough: the original problem, the changed process, the result, and the next step.
For the Northline example, show a simplified version of the scattered requests, followed by the shared queue. When the narrator mentions the improvement, display the two response times alongside the four-week pilot period.
Use actual approved screenshots where they help. If you use a mockup, label it as illustrative. Remove customer names, email addresses, and other private details from any screen capture.
Avoid filling every second with movement. Hold a diagram or screenshot long enough for someone unfamiliar with the product to understand it. Keep music low enough that it never competes with the narrator.
6. Review it as a buyer, then share it
Watch the video once with sound and once without it. Add accurate captions, checking names and numbers by hand. Make sure the result and its qualifying context remain visible on a phone screen.
Ask a colleague who was not involved in the project to explain the story back to you. They should be able to name the problem, describe the change, and recall the main result. Their questions will show you where another edit is needed.
Before release, confirm that the customer approves the video’s use of its name, logo, quotes, and results. End with one clear invitation to read the full case study, where viewers can examine the details.
Publish it where that case is useful: beside the written story, in a relevant sales follow-up, or in a social post aimed at the same buyer. Track visits to the full case study and the questions viewers ask. Those signals can help you decide which customer story to adapt next.