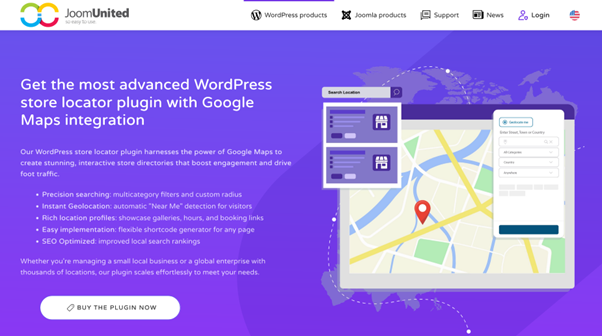
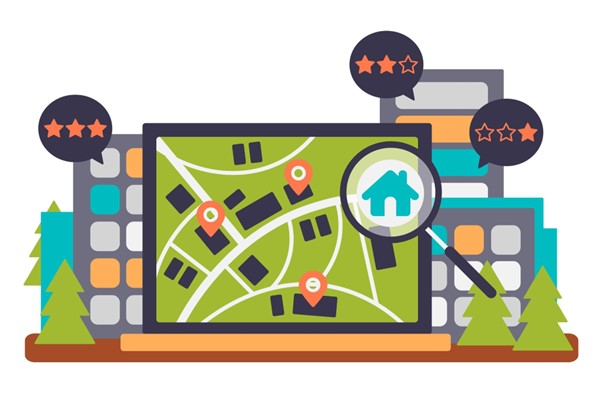
Enhancing Customer Experience with WP Location Finder: The Ultimate WordPress Store Locator Plugin
Help customers find your nearest store easily. Use WP Location Finder to boost in-store visits and enhance offline engagement.

Providing an optimal customer experience involves the products offered and the ease of access to the business location. This is where the store locator plugin comes in. These plugins help visitors find your physical store quickly and easily from the website.
One of the best WordPress store locator plugins is WP Location Finder. This plugin makes it easier for customers and is also a practical solution for business owners who want to increase brand credibility and attract more visitors to their offline stores. In this article, we will discuss the main features, benefits, and installation guide of WP Location Finder.
Benefits of using Store Locator Plugin for Businesses

Using the store locator plugin provides several significant benefits to your business. Here are some of the benefits that you will obtain.
Enhancing Customer Satisfaction
One key to maintaining customer loyalty is providing a convenient and efficient experience when they’re searching for information. With a store locator feature, customers no longer have to manually look up addresses or contact customer service to find the nearest store.
When customers feel helped and encounter no obstacles in locating a store, they are more likely to feel satisfied with the service. This satisfaction shapes their perception of your brand and increases the likelihood of repeat purchases or recommendations. In the long run, this convenience becomes a competitive advantage that sets your business apart.
Driving More Visits to Physical Stores
When customers can easily find the nearest store, complete with routes and directions via Google Maps, they are more inclined to visit the location in person. This is especially useful for businesses that rely on offline sales or face-to-face interactions, such as retail shops, restaurants, or showrooms.
An increase in foot traffic also means higher sales potential. In many cases, in-person shoppers are more likely to make impulse purchases that wouldn’t happen through online channels alone. The store locator becomes a powerful tool for driving traffic and supporting your offline sales goals.
Building Brand Credibility
A professional, accurate map integrated into your store pages gives the impression that your business is trustworthy and well-organized. A high-quality store locator plugin often offers extensive customization options, like SVG-based store icons and full profiles for each location, that can align with your brand’s visual identity.
Additionally, providing complete details such as opening hours, store images, and contact info signals that your business is serious about helping customers. The more structured and informative your location page is, the more likely customers are to trust your brand. In today’s competitive digital landscape, that trust can strongly influence consumer decisions.
Optimizing Both Online and Offline Presence
A store locator plugin helps businesses strengthen their presence across both online and offline channels. Through location-based search and integrated maps, online visitors are guided straight to offline service points, fostering a more personal connection between the brand and the customer. This is especially valuable for local businesses looking to reach nearby consumers.
In addition, the plugin supports local SEO by allowing each store location to be optimized for geographic searches. As a result, your site becomes more discoverable by people actively searching for services in their area. The combination of online visibility and offline accessibility makes the store locator plugin a strategic asset for long-term business growth.
What is WP Location Finder (and Key Features)
WP Location Finder is a store locator plugin for WordPress that allows businesses to display their store locations through an easy-to-use interactive map. Suitable for small businesses to large franchise chains, this plugin makes it easy for customers to find nearby stores with automatic geolocation, advanced search filters, and a user-friendly design.
Additionally, the plugin integrates with various popular page builders and supports customization without the need for coding skills.
The plugin serves not only as a navigation aid, but also as part of a digital strategy that strengthens a business’s offline presence. With SEO-optimized store pages and customizable map views, WP Location Finder helps attract more visitors to physical stores while maintaining brand consistency on the website.
Key features
- GPS-based automatic location detection (Near Me geolocation)
- Integration with Google Maps and OpenStreetMap
- Customizable search filters (radius, category, country)
- Flexible shortcode generator for map integration into any page
- Support for multiple categories and cross-country locations
- Complete store profile with gallery, operating hours, and contact info
- Route and navigation features directly from Google Maps
- Analytics to monitor store location performance
- SVG-based custom icon support for map branding
How to Install and Configure WP Location Finder
Before taking advantage of all WP Location Finder’s excellent features, you must install and configure it properly. Check out the steps below.
1. Installing WP Location Finder
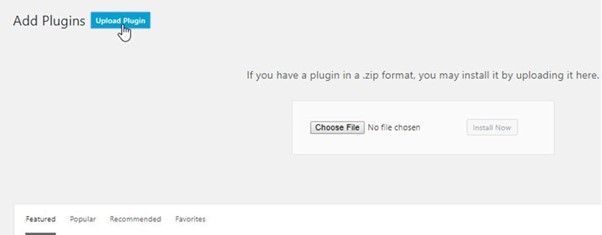
To get started, you can install the WP Location Finder plugin like any other WordPress plugin. Go to your WordPress dashboard, open the Plugins > Add New menu, then upload the plugin file you obtained in .zip format. Once done, click Activate Plugin.
Once the plugin is active, you’ll see a new menu called WP Location Finder on the left sidebar of your WordPress dashboard. But before using it, make sure you’re logged into your JoomUnited account to access all the plugin’s features.

2. Setting the Google Maps API Key
For the map to appear and work properly, you must add a Google Maps API Key. Open Google Cloud Console. Then, create or select the project you want to use. Click + Create credentials, then select API Key.
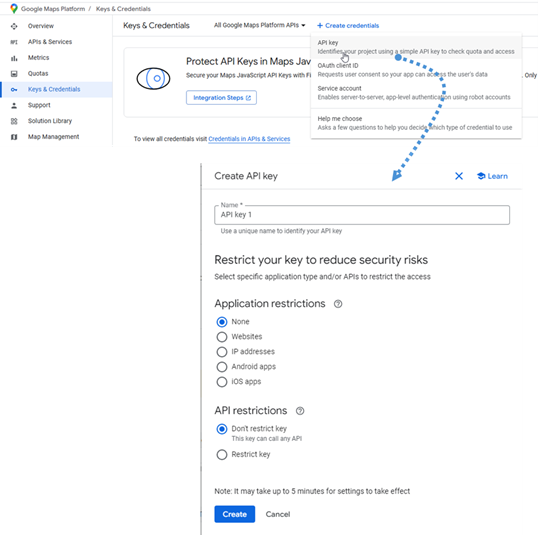
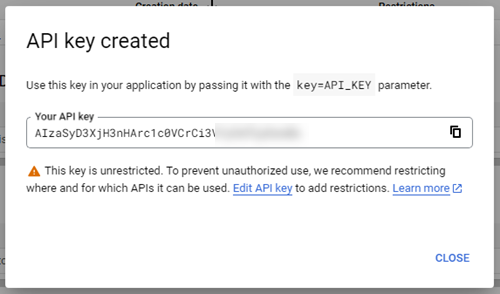
When it appears, save the generated API key.
Next, you must enable the following API services in Google Cloud Console:
- Maps JavaScript API
- Geocoding API
- Geolocation API
- Places API
- Directions API
After everything is active, you can proceed to the next step, which is creating a Map ID to display maps with specific configurations. To create it, open the Map Management page in Google Cloud Console, then select the Create Map ID button.
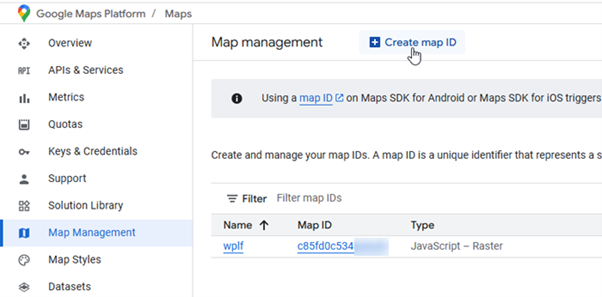
Fill in the ID name and description (optional), then select the map type (JavaScript and Raster or Vector). Click Save and save your Map ID.

3. Basic Plugin Configuration
Back in your WordPress dashboard, go to WP Location Finder > Settings. Enter the Google Maps API Key and Map ID that you created earlier.
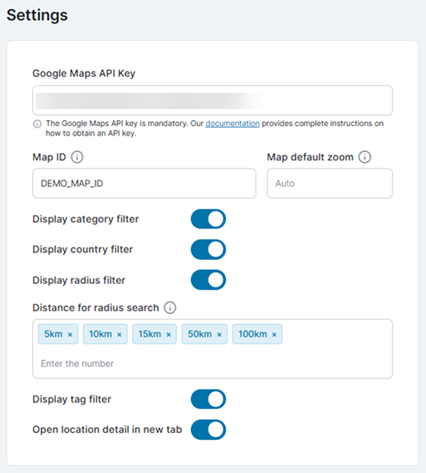
In this section, you can also set:
- The default zoom of the map when the page is opened
- Show or hide filters (category, country, radius, tags)
- Set the default search distance
- Option to open location details in a new tab
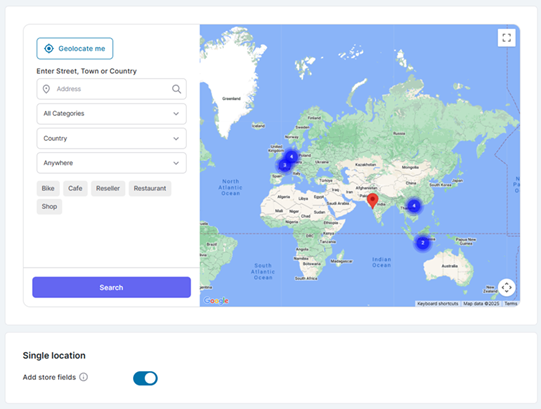
The locations you have created will be displayed on the map in the Settings section.
4. Create your Location
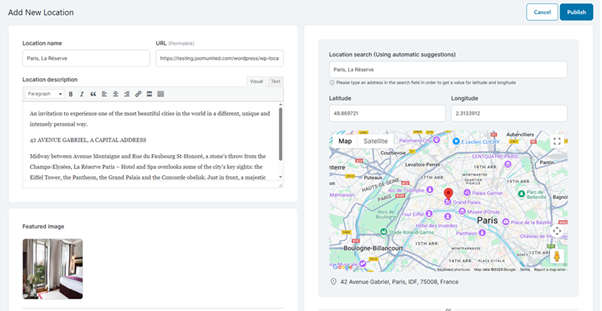
To add a new location in WP Location Finder, go to the Location Finder > All Locations menu, then click the Add New Location button.
After that, you will be redirected to the new location creation page. On this page, there are two main panels: the left panel to fill in the location details and the right panel to display the map. Here are some of the fields that need to be filled in, namely.
- Location name: Enter the location name or address.
- Location search: Type the address in the search field so that the system automatically fills in the coordinates (latitude and longitude).
- Location description: Add a short description of the location.
- Manual address input: If you want to fill in the address manually, click the arrow below the map to display all address fields in full.
Scroll down to find further settings such as:
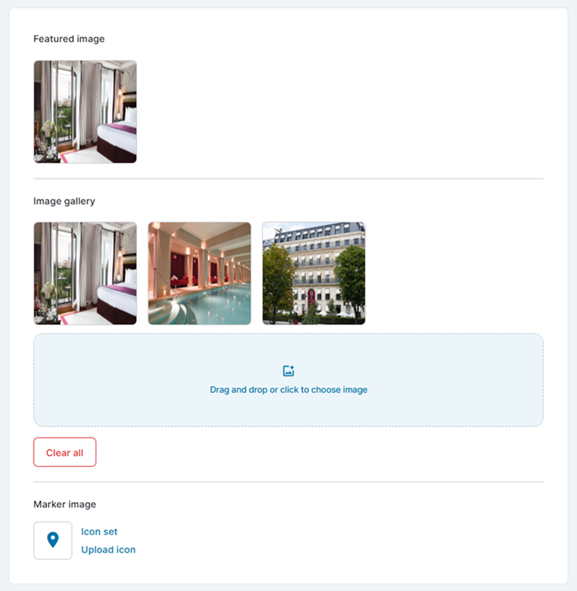
- Feature image: Select a main image to represent the location.
- Image gallery: Upload some additional images for the location.
- Marker image: Select a marker icon from the list of available icons or upload your own.
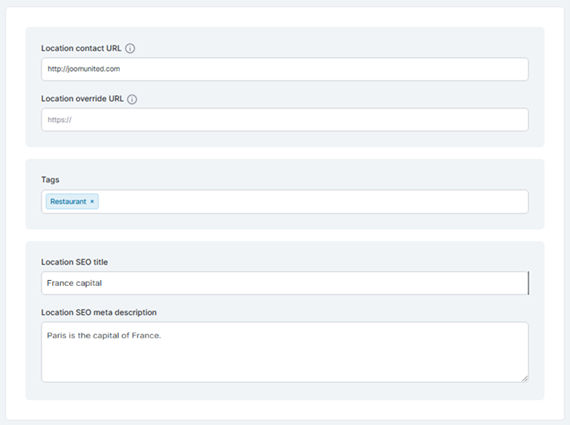
- Location contact URL & Override URL: Add a contact link or override URL if needed.
- Tags: Add tags to categorize locations.
- SEO title & meta description: Fill in the title and meta description for SEO purposes.
You can also select one or more categories for the location. In the Publish section, specify the status (Draft, Pending Review, or Published), visibility settings (Public, Password Protected, or Private), and publication time (immediate or scheduled). After that, the shortcode will automatically appear and can be used to display the location on any page on your site.
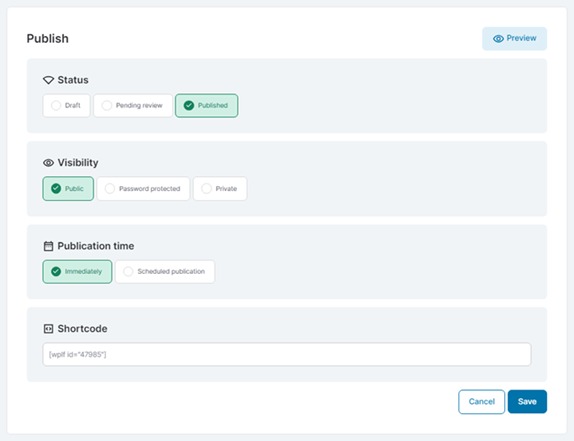
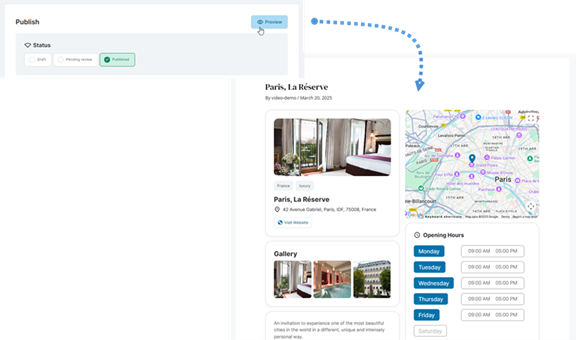
Finally, click the Preview button in the Publish section to see how the location will look on your site before it is officially published.
That’s it, you’ve successfully installed, configured, and tried to create your store location with WP Location Finder.
Tips to Optimize Store Locations on the Map
When adding store locations to your map, it’s important to apply a few tips to ensure your locations are properly optimized. Here are several ways to improve their effectiveness:
Use Map Colors That Match Your Brand Palette
One of the most effective ways to make the map blend seamlessly with your website’s design is to match the map’s color elements—such as roads, backgrounds, and labels—to your brand color palette. WP Location Finder allows you to apply custom styles to Google Maps, making it easy to maintain a consistent look.
Choosing the right colors reinforces your visual identity and gives the page a more professional appearance. You can use tools like Snazzy Maps to find a suitable color template and apply it to your map settings.
Use Custom Marker Icons
Instead of using the standard Google Maps pin, you can upload a custom location icon tailored to your brand, such as your logo or a unique store symbol. This helps your location stand out on the map while reinforcing a professional impression.
The plugin also provides options to replace marker icons directly in the location settings panel. You can upload SVG or PNG files with custom colors and shapes that reflect your brand’s character, making it easy for users to spot your store among many others.
Add Relevant Images and Galleries
Displaying store images or the surrounding area offers engaging visual context for visitors. This helps build trust and assists customers in locating your physical store. WP Location Finder offers an image gallery feature for each store location you create.
Ensure your images are high quality and aligned with your brand’s aesthetic. For example, if your brand embraces a minimalist look with neutral colors, use photos that reflect a similar style to keep the user experience consistent across pages.
Customize the Location Search UI Elements
The layout of the location search form can also be customized to look cleaner and more integrated with your website design. You can adjust settings like search radius, category filters, and country dropdowns to fit your design preferences.
You’re free to set button positions, colors, and label texts so users don’t feel a jarring shift in layout when using the store locator feature. This is especially important for websites with a clean, modern look where every visual element needs to feel harmonious.
Conclusion
Making it easier for customers to find your physical business locations is key to delivering a positive user experience. When visitors can quickly and accurately locate the nearest store through your website, it not only improves their convenience but also strengthens the potential for offline conversions.
WP Location Finder is an excellent choice if you’re looking for a WordPress plugin that offers reliable, feature-rich, and highly customizable location search functionality. With powerful features like automatic geolocation, interactive maps, and flexible integration, this plugin is ready to support your business’s online and offline growth.